

Creating a simple Kotlin Multiplatform project based on moko-template
1. Intro
In this lesson we will cover developing small application for iOS and Android using Kotlin Multiplatform based on moko-template.
Tools
We will need:
- Android Studio 3.4.0+ (do not use 3.5.1 version, cause there is a bug is breaking MPP project);
- Xcode 10.3+;
- Xcode Command Line Tools (
xcode-select --install); - CocoaPods (
sudo gem install cocoapods); - JDK - required to run
gradlefromXcode build phase.
The Result
As the result of GiphyApp lessons you will get an application to view gif files using GIPHY API.
UI of this application will be completely native, player of gif files will make using native libraries glide for Android and SwiftyGif for iOS.
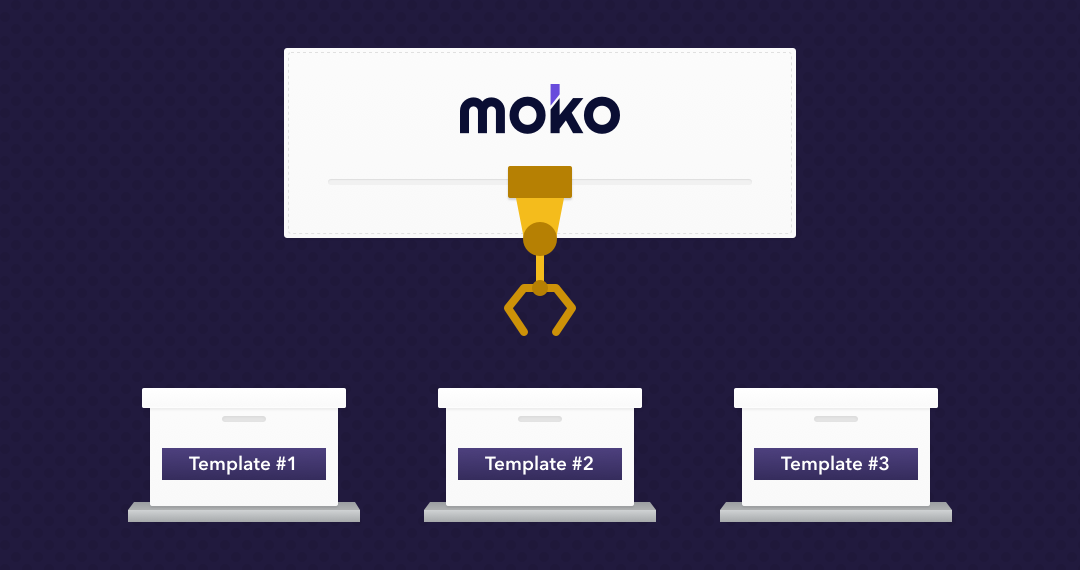
2. Create the project based on moko-template
For creation we will use project template from moko-template.
The project template already has preconfigured builds of iOS and Andoroid application with shared library and you will save the time to integrate shared library to iOS project on iOS platform, to configure Kotlin Multiplatform modules and dependencies (using mobile-multiplatform-gradle-plugin you can make configuraion is simplier). The project template has a sample of several features as well as.
Use this template
To use this template you have to go on GitHub repo moko-template and press a green button Use this template. As the result, you create a new repository according to the last commit of master branch of moko-template project.
After succefull creation you should clone this rep: git clone <git url of repo>.
3. Test build
To be sure that start state is correct, will run the both applications. To do this:
- on Android: open root repository directory in Android Studio, wait while
Gradle Syncwill finish, and runandroid-appas regular application. - on iOS: install project's CocoaPods (in directory
ios-apprun a commandpod install, and after this openios-app/ios-app.xcworkspacein Xcode and pressRunfor running application.
Building of Kotlin/Native can take a time (it will start automatically on doing pod install as well as building iOS project).
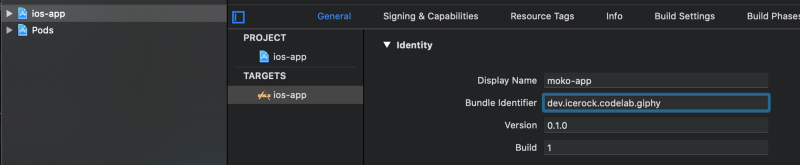
4. Setting up an application identifiers
You can set an appllication identifiers like you do in regular Android and iOS application:
Change Appliсation Id
You can set an appllication identifiers like you do in regular Android and iOS application:
Change Appliсation Id
Android - in file android-app/build.gradle.kts need to change:
android {
    ...

    defaultConfig {
        ...

        applicationId = "dev.icerock.codelab.giphy"
        ...
    }
}
iOS - you have to set Bundle Identifier in the project's setting in Xcode like on the screenshot below:
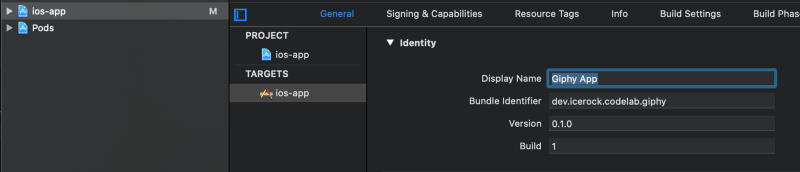
Change an application name
Android - in file android-app/src/main/res/values/strings.xml change:
<resources>
    <string name="app_name">Giphy App</string>
    ...
</resources>
iOS - you have to set Display name in the project's setting in Xcode like on the screenshot below:
Change an application icon
You can download the icon's resources here.
To change Android icons you have to move content of android directory of this archive in android-app/src/main/res directory. After this, you need to set this icon on android-app/src/main/AndroidManifest.xml:
<manifest>
    <application
        ...
        android:icon="@mipmap/ic_launcher">
        ...
    </application>
</manifest>
To change icons on iOS you have to replace ios-app/src/Assets.xcassets/AppIcon.appiconset directory by the archive's version.
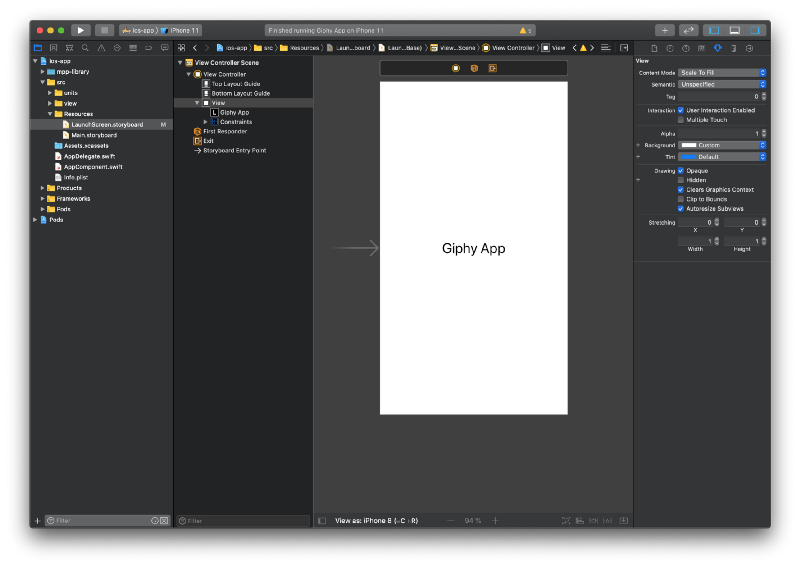
Change launch screen
There is a launch screen on iOS and to replace it you have to modify ios-app/src/Resources/LaunchScreen.storyboard file. For example, let's just change a text like on screenshot:
5. Next steps
On the next lesson GiphyApp #2 we will create a Gif list.